
What Happens During a Panel Upgrade: Step by Step
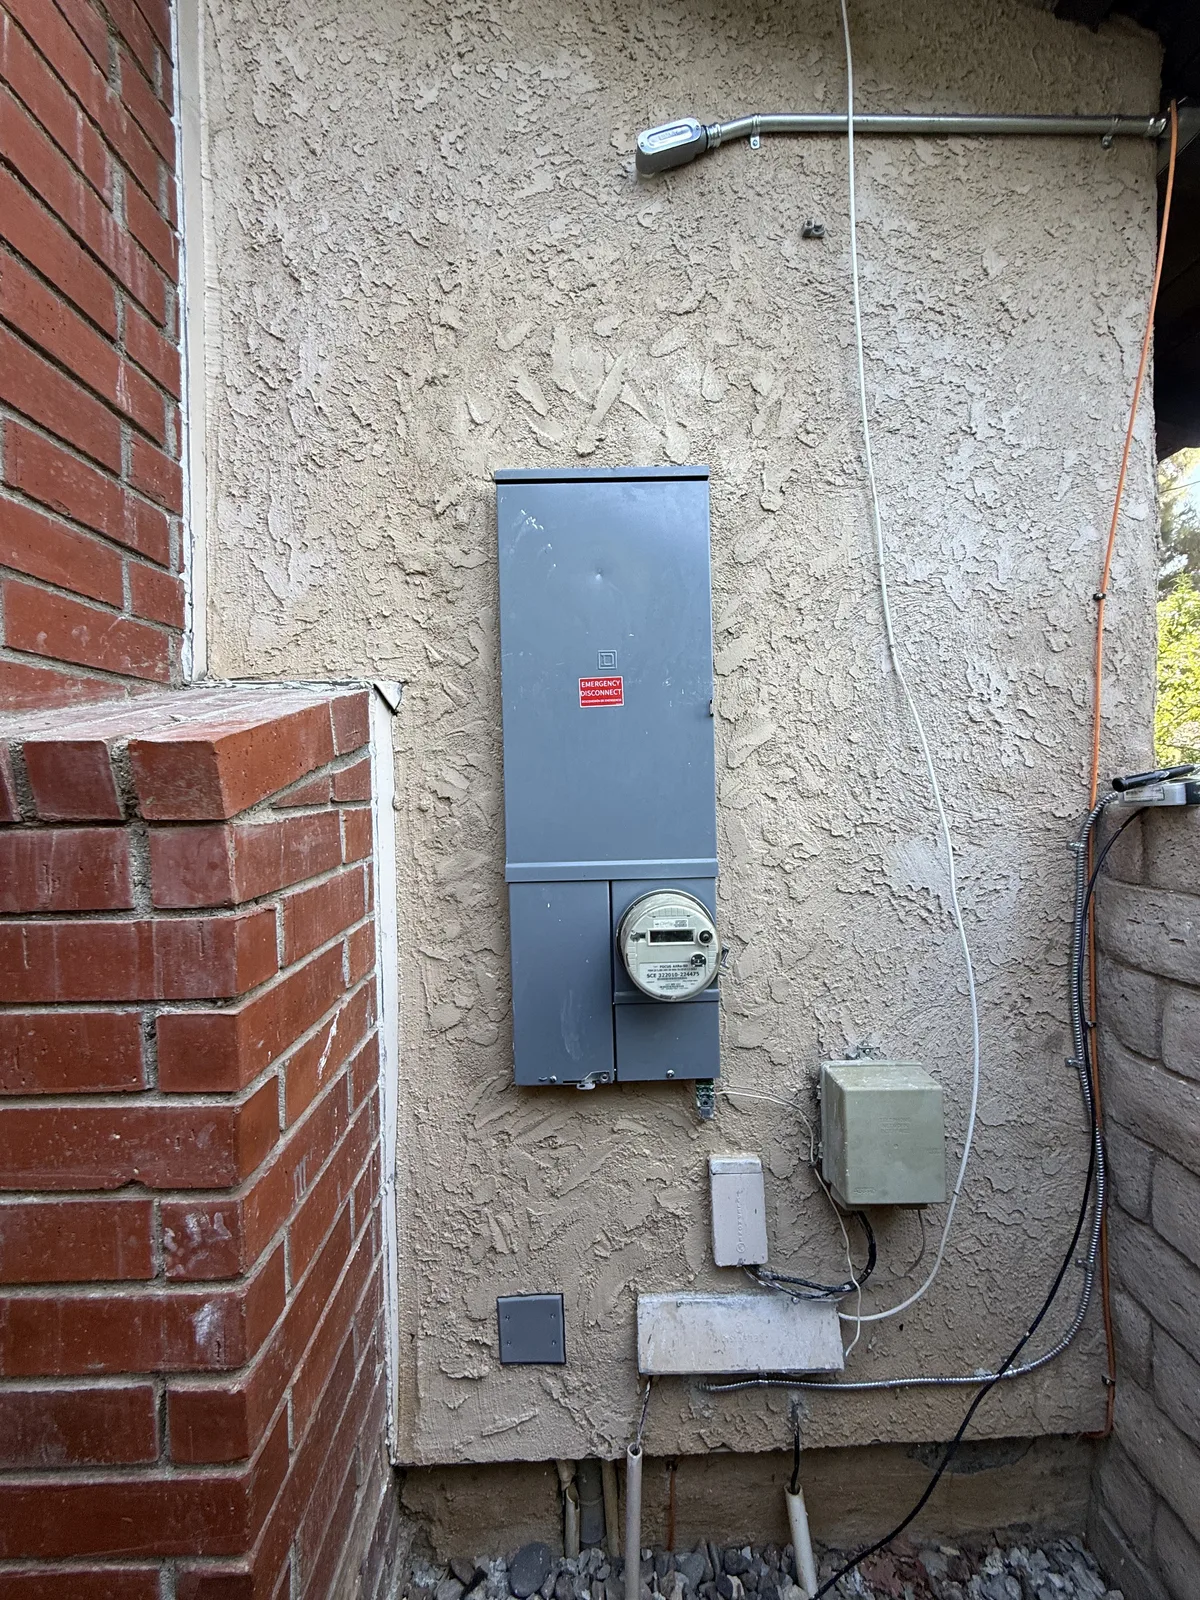
Most homeowners only see a panel upgrade from the driveway: a truck shows up, the power goes off, and then there’s a new gray box on the wall. A lot happens between “we need a new panel” and the lights coming back on, though, and knowing the order takes most of the stress out of it. Here’s the service panel upgrade process the way it actually runs, step by step, with photos from a real job in Simi Valley.
Step 1: The walkthrough and load calculation
Every upgrade starts with a visit. We look at the panel you have now: its brand and condition, the size of the main breaker, how many breaker spaces are left, and any rust, heat damage or a known-problem design. We also look at the meter, at how power reaches the house (overhead wires from a pole, or underground), and at how the system is grounded.
Then comes the load calculation. That’s a standard worksheet that adds up what your home can draw (air conditioning, range, dryer, water heater and the rest), plus anything you plan to add, like a Level 2 EV charger or a heat pump. The result tells us what size service the house needs.
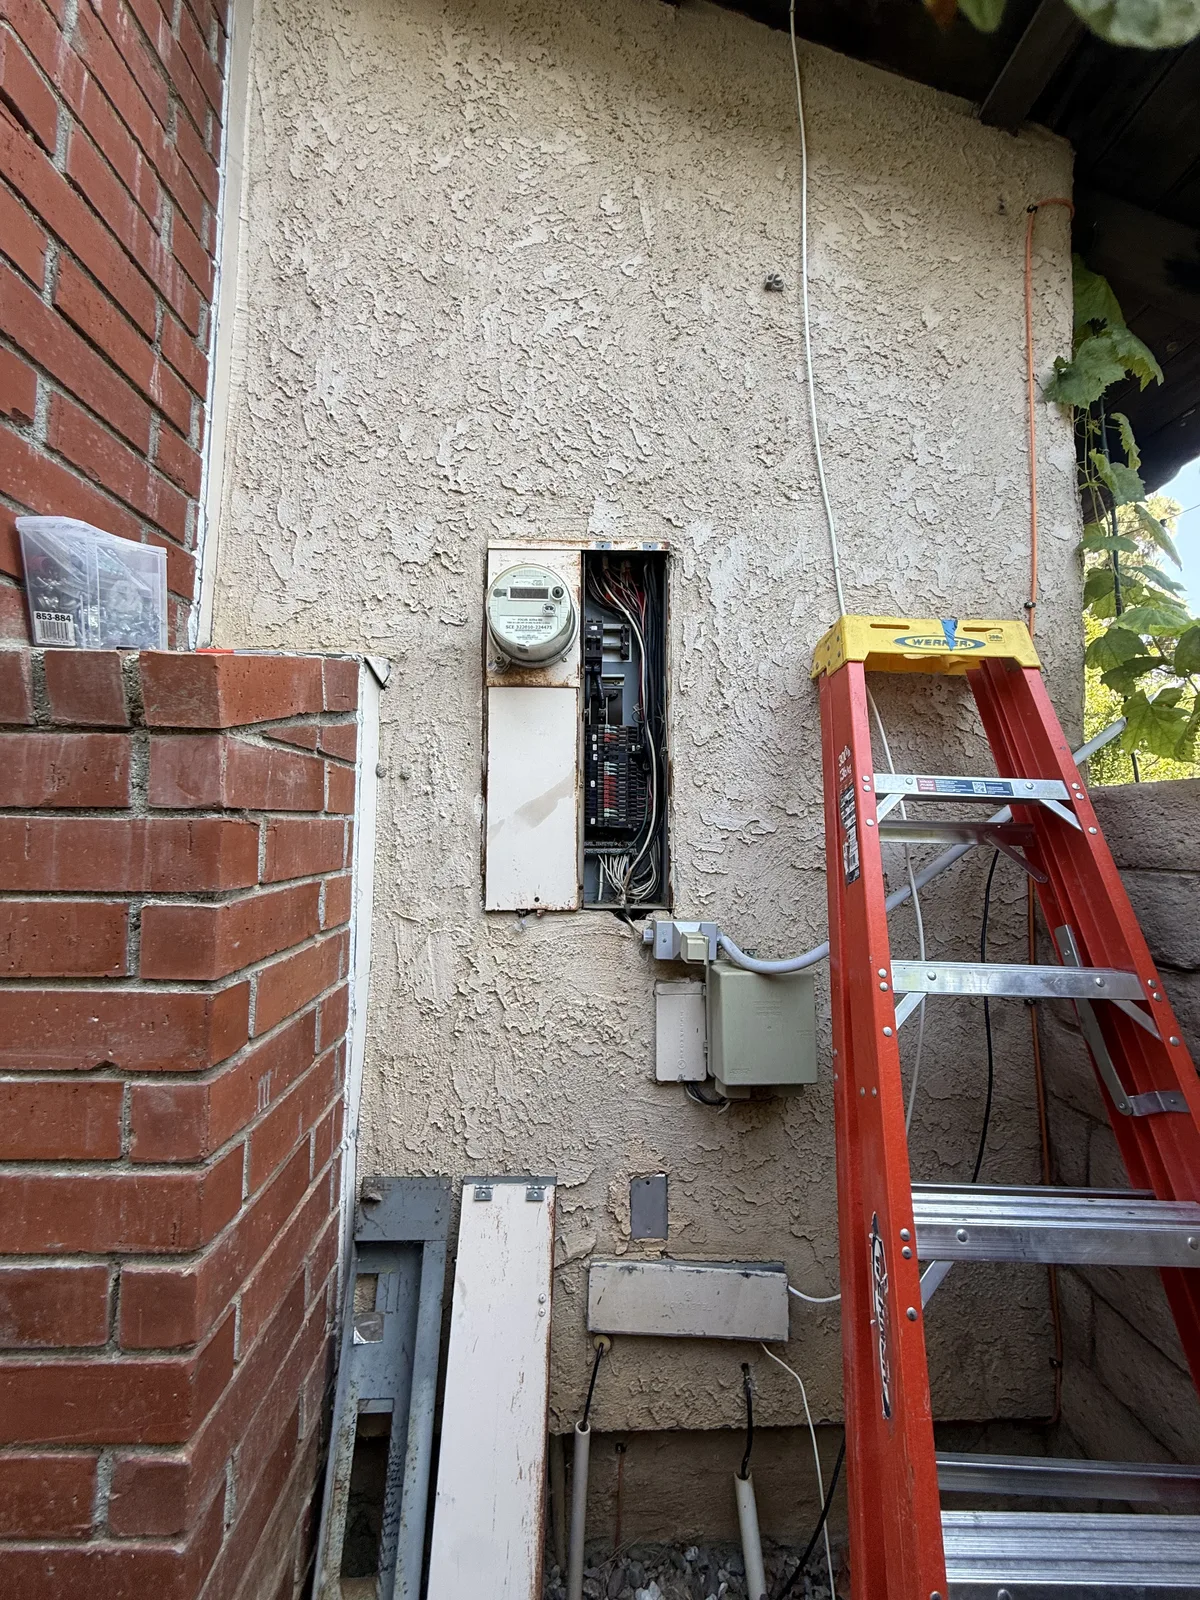
On that Simi Valley home, the old exterior meter-main was rusted and failing and could no longer safely carry the load. The homeowner also wanted a Level 2 EV charger in the garage, so the plan covered both.
Step 2: The estimate
After the walkthrough you get a free estimate, up front. A good one spells out:
- The new equipment: its amperage, and whether it’s an all-in-one meter-main (the meter socket and the main breaker panel in one box, common on exterior walls in Southern California) or a separate meter and panel.
- The location: whether the panel stays in the same spot or moves.
- Wall work: whether the wall has to be opened, and whether patching is included.
- Paperwork: who handles the permit and the utility scheduling.
- Exclusions: anything the price doesn’t cover.
Costs depend on your panel, your service and your walls, so we quote after we’ve seen them, never sight-unseen over the phone. If the upgrade is for an EV charger, look at the EV charger rebates before work starts. With SCE’s Charge Ready Home program, you apply with the utility first and get a Prequalification ID in your own name. We help you apply, then handle the permit, the program paperwork and the install.
Step 3: The permit
A panel or service upgrade is permitted work. We pull the electrical permit with your city or county, and depending on the city, the application may include the new equipment’s specs and the load calculation. The permit brings an inspector out to check the work and keeps the upgrade on record.
Step 4: Coordinating the shut-off and reconnect with the utility
This is the step most people don’t expect. The meter, and the lines that bring power to your house, belong to the utility: SCE in most of our area, though a few cities have their own utility. We can’t simply switch off the main breaker and start, because the wires feeding the main breaker stay live even when it’s off. The utility has to cut power on its side before the old equipment comes out, and it has to reconnect afterward.
We set that up with the utility. If the amperage is going up, the utility may also review its side of the connection, which can add time. Its schedule often decides the upgrade date, so we confirm the day once that appointment is booked.
Step 5: Upgrade day
The swap itself is often done in a day; permits, inspection and utility scheduling add time and vary by city. Here’s what the day usually looks like:
- Power off. Once the utility has disconnected, everything is tested to confirm it’s dead before anyone works on it. Expect the house to be without power for part of the day.
- Old equipment out. Each circuit is identified and marked as it comes off the old breakers, then the old panel and meter base come out. On a panel set flush into stucco, like the one in Simi Valley, that means cutting the stucco back around it.
- New meter-main set. The new equipment is mounted, leveled and connected to the incoming service wires, up through the mast to the weatherhead on an overhead service or down to the underground conduit.
- Circuits landed and labeled. Each circuit is landed (electrician talk for connected) on a new breaker matched to its wire, tightened to the manufacturer’s torque spec, and written into a clear panel directory. A wire that comes up short is extended the approved way, never stretched.
- Grounding and bonding. Grounding connects your electrical system to the earth through ground rods or other approved electrodes. Bonding ties metal parts, like the panel and metal water piping, together so a fault trips a breaker instead of leaving something energized. At the main panel, and only there, the neutral and ground are joined. An upgrade is the time to bring all of this up to current code, which can mean new ground rods or a new grounding conductor.

California’s current electrical code also calls for an emergency disconnect outside the house that firefighters can reach when a service is replaced. On an exterior meter-main, the main breaker usually fills that role. That’s what the red “Emergency Disconnect” label on the Simi Valley panel marks.
Step 6: Inspection
The inspector checks the work against code, typically the breaker and wire sizes, grounding and bonding, the working clearance in front of the panel, labeling and that emergency disconnect. We schedule it as part of the job.
The order of this step and the next one varies. In many cities, the utility won’t restore power to new service equipment until the building department has inspected it and released it. In others, power can come back first and the inspection follows. We know which applies once the permit is pulled, and we tell you before upgrade day.
Step 7: Power back on
When the utility reconnects, we turn on the main breaker, then the branch breakers one at a time, and check that each circuit works. Before we leave, we walk you through the new panel: where the main breaker is, how the directory reads, and how to reset a tripped breaker.
Expect the oven and microwave clocks to blink, and give the Wi-Fi router a few minutes to reconnect. On the Simi Valley job, the same project then ran a circuit in EMT conduit through the garage to a hardwired 240-volt Level 2 EV charger.
Step 8: Finishing up and the stucco patch
Once the new panel is in, the stucco opening is closed in layers: waterproof flashing tape sealed around the box, building paper and wire lath over the framing, then stucco coats and a texture to blend with the rest of the wall.
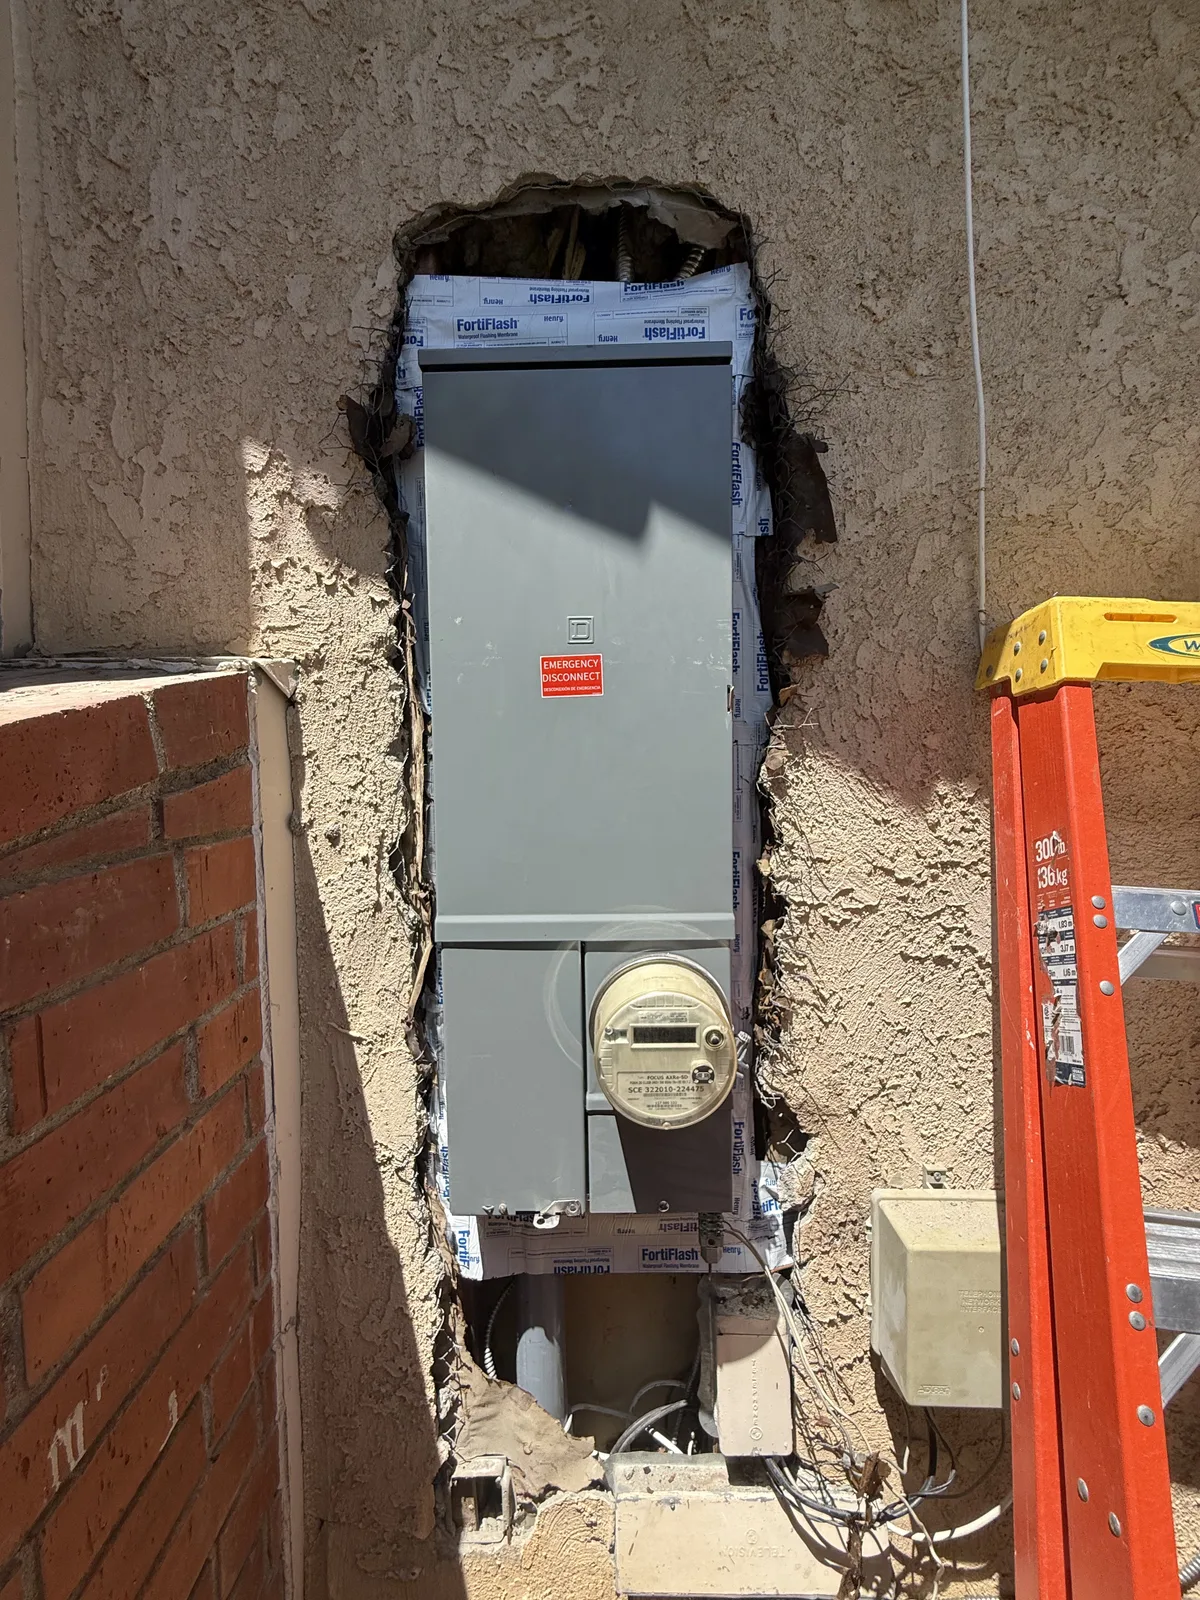
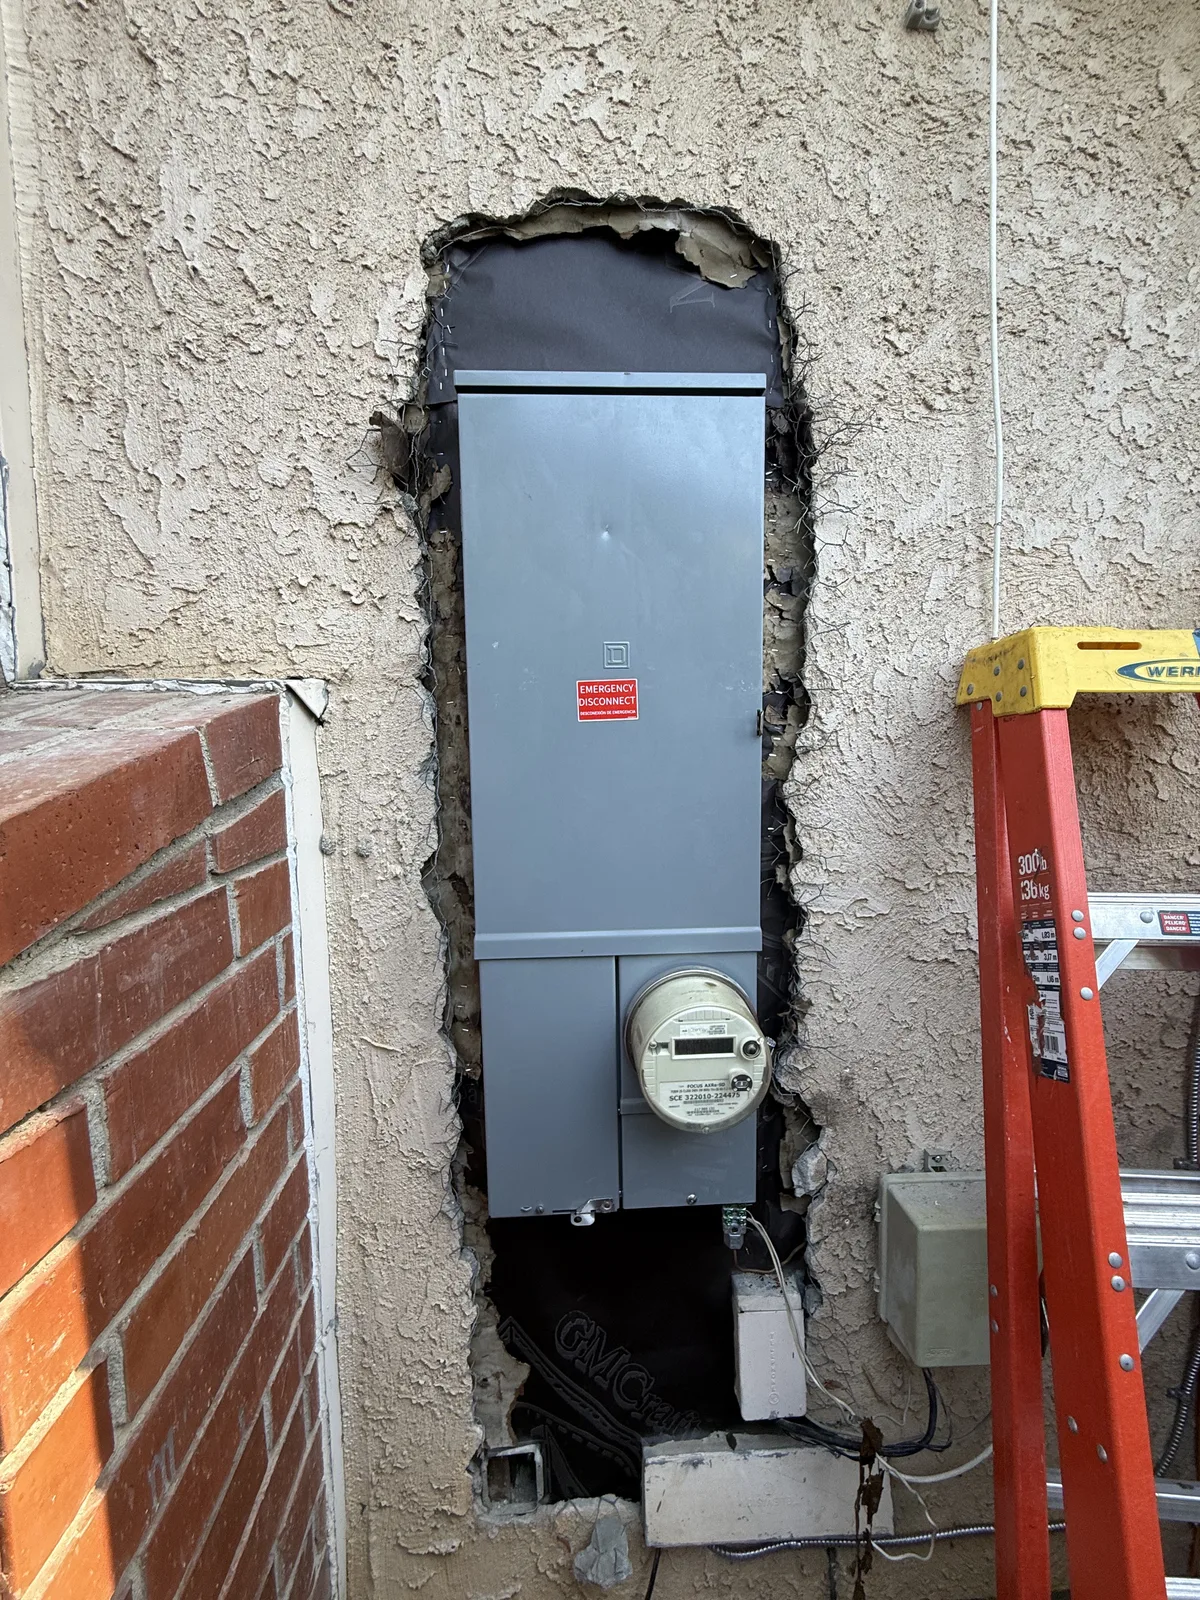
The photo at the top of this post is the same wall after the patch. A surface-mounted panel, or one on siding, often needs no wall work at all. Last comes the cleanup: the old equipment goes, and the work area is left clean.
When to call an electrician
If you’re planning an EV charger or new AC, or you’re living with a rusty, full or recalled panel, the walkthrough is the place to start. This is never a DIY job: anything inside the panel, and all service work, belongs to a licensed electrician. Based in Lancaster, we handle panel upgrades and rewiring across the Antelope Valley, the High Desert and the greater LA area, and you can see more finished jobs on our projects page. Request a free estimate or call (661) 744-6232.
Common questions
Do I need to be home during a panel upgrade?
Someone should be there at the start, so we can get to the panel and check circuits inside, and at the end, so we can walk you through the new panel. In between, the power is off for part of the day, so plan around the fridge, a home office and anything else that can't lose power. If someone in the home relies on medical equipment, tell us when we schedule.
Does the power company have to be involved in a panel upgrade?
For a service upgrade, yes. The meter and the lines that bring power to your house belong to the utility (SCE in most of our area), so it has to disconnect power before the old equipment comes out and reconnect it afterward. We set up that coordination, and the utility's schedule often decides the upgrade date.
Will the new panel go in the same spot as the old one?
Usually, because keeping the location lets the existing circuits be reconnected without long new runs. Sometimes code clearances, the utility's meter requirements or a planned addition make moving it the better choice. That gets decided at the walkthrough and written into the estimate.
Who repairs the wall around the old panel?
Ask before you sign, because it varies by job. A panel set flush into stucco usually means opening the wall, and on the Simi Valley job in this post the stucco was patched and textured around the new panel. A surface-mounted panel often needs little or no wall work.